

 HANDS ON SharePoint
 HANDS ON Teams
 HANDS ON Lists
 HANDS ON tek
 M365 Admin
Revolutionizing list filtering: Introducing Microsoft Lists new filter pills!
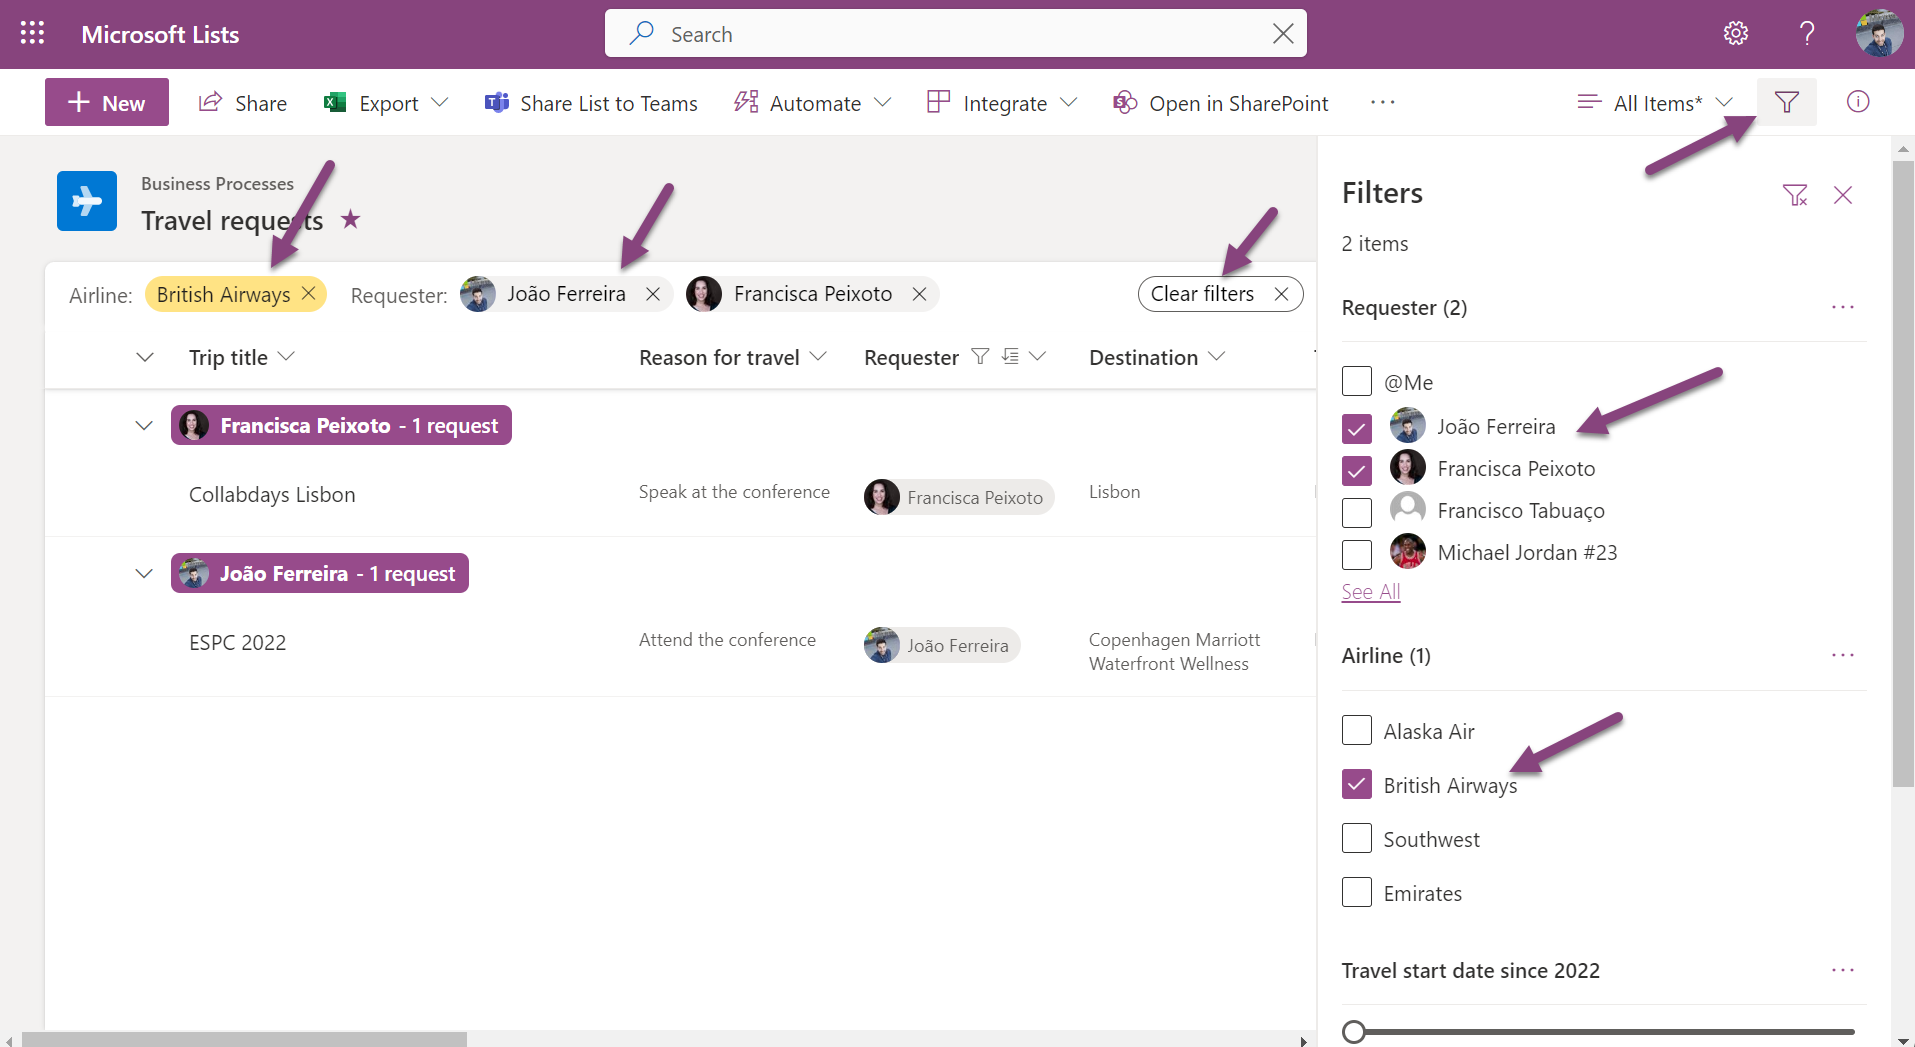
If you’re a SharePoint or a Microsoft Lists user, you’ll be pleased to know that the platform has just received a new filtering feature that is set to make your life a lot easier. With the introduction of “filter pills”, it’s now easier than ever to filter your lists and find the items you need.
This new filtering system is a great addition to Microsoft Lists, and it’s likely to be particularly useful for those who work with large lists or who regularly need to filter their data. With the ability to quickly and easily see which filters are applied and remove them as needed, this new feature is sure to save users time and frustration.

The new filter pills appear at the top of the page, and they make it easy to see which filters are currently applied to the list you’re viewing. You can click on any of the pills to remove that filter, and you can also remove all filters at once by clicking the “Clear Filters” button. This new feature is particularly useful if you’ve saved filters to a view and want to quickly clear them to see all items in the list.
But that’s not all. The new filter pills also work in conjunction with item groupings and view creation. With these features, you can create custom views of your data that are tailored to your specific needs. And with the filter pills, you can easily switch between different views and remove filters as needed.
How to use Microsoft Lists filters
Whether you’re working with a small list or a large library, the filter pane can help you save time and increase productivity by displaying only the information that’s relevant to you. To use the filter pane in Microsoft Lists and SharePoint document libraries do the following:
- To open the filter pane, navigate to the top right of your list or library and select the filter icon
- Once the filter pane is open, you will see a list of filters that are based on the list items currently in view
- To apply a filter, simply select the checkbox or checkboxes next to the filter you want to apply
- To remove a filter, uncheck the checkbox next to the filter you want to remove, or use the cross icon in the filter pill at the top of the list
- When you’re finished filtering, you can clear all filters by selecting the clear filter icon at the top right of the filter pane, or use the clear filters pill at the top of the list
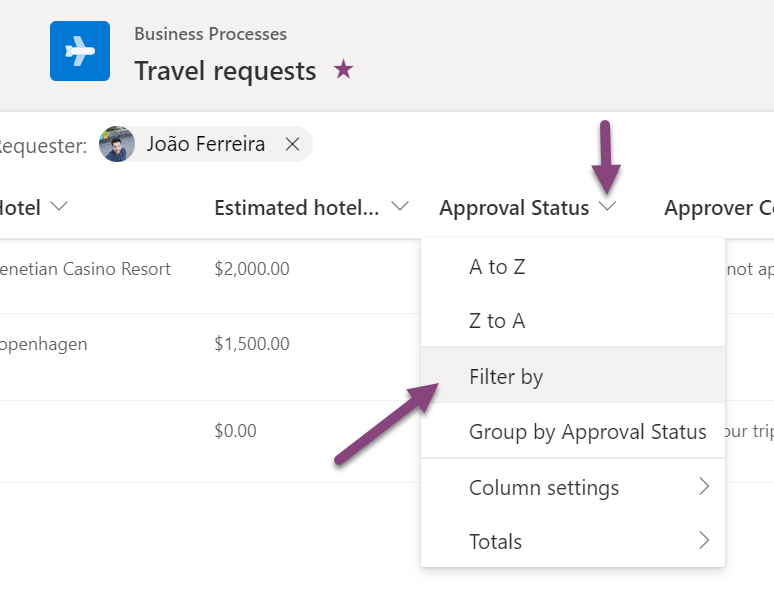
If you’re already familiar with SharePoint features like column headers and views, you’ll find that the filter pane in Microsoft Lists works seamlessly alongside these tools. Depending on the column type, you can set filters directly from the column header dropdown or by selecting “Filter by” to open the filter pane. The filters you select in the column header menu will also appear in the filter pane and in the filter pills.
Conclusion
In summary, the new filter pills in Microsoft Lists are a welcome addition to the platform. They make it easy to filter your data, create custom views, and switch between different views as needed. If you’re a Microsoft Lists user, be sure to give this new feature a try and see how it can streamline your work processes and make your life a lot easier.


February 16, 2024
Hi,
Is there a way to show all but the empty cells in a column?
So a bit more advanced filter like NOT “”
tnx
February 16, 2024
Hi Rogier,
I understand what you are trying to do, but no it is not possible to do something like that with Microsoft Lists.
Have a nice weekend 🙂