

 HANDS ON SharePoint
 HANDS ON Teams
 HANDS ON Lists
 HANDS ON tek
 M365 Admin
How to Create Ratings Columns in Microsoft Lists with the New UI
If you are a fan of Microsoft Lists, you might have noticed a new feature that makes it easier to add ratings columns to your lists. Ratings columns allow you to collect feedback from your users or team members in the form of stars or thumbs up/down. They are a great way to measure satisfaction, popularity, or quality of your list items.
In the past, adding ratings columns to your lists was not a straightforward process. You had to either go to the classic list settings and enable ratings from there, or use PowerShell to activate ratings on modern communication sites. I wrote about this limitation in a previous blog post.

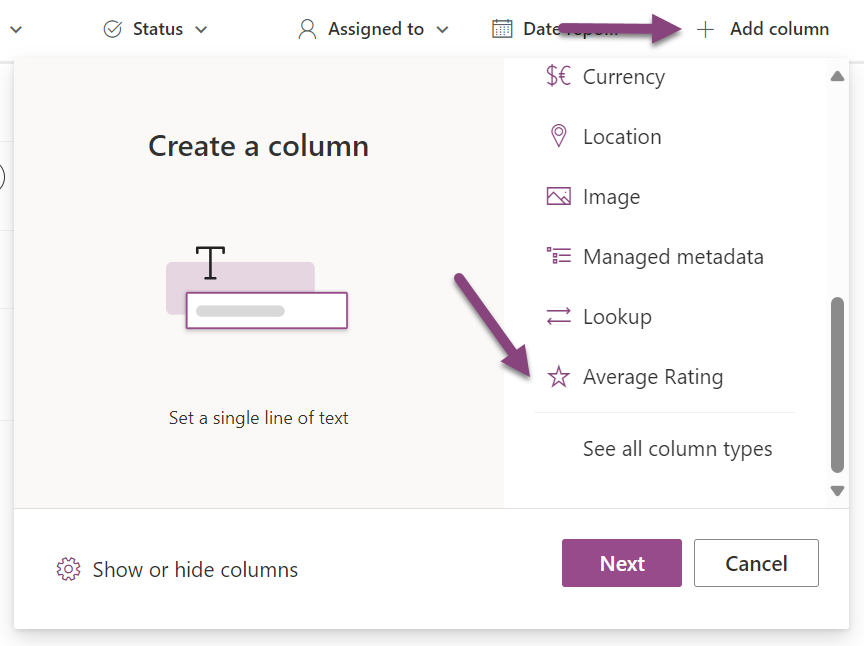
But now, with the new UI of Microsoft Lists, you can add ratings columns to your lists with just a few clicks. Here is how to do it:
- Open the list you want to add ratings to, and click on the + Add column button
- Choose Average Rating from the drop-down menu
- The column is displayed with the default name Rating (0-5)
- To vote in the list item click in the star correspondent to your rating
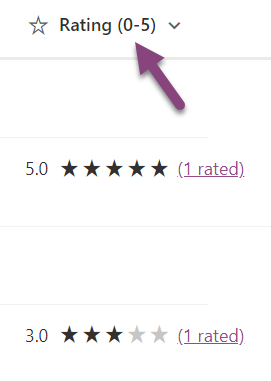
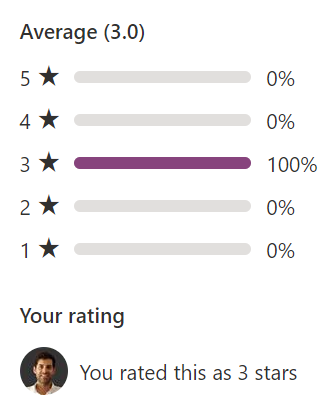
- To view in detail the rating history click in the link next to stars, and a pop-up will open showing the details for the rating and the users who voted
That’s it! You have successfully added a ratings column to your list. Now you can see the ratings column on your list view, and you and your users can rate the list items by clicking on the stars or the thumbs icons. You can also sort, filter, or group your list by the ratings column.
Ratings columns are a simple but powerful feature that can enhance your lists and make them more interactive and engaging. Try them out today and let me know what you think in the comments below.


No comments yet