

 HANDS ON SharePoint
 HANDS ON Teams
 HANDS ON Lists
 HANDS ON tek
 M365 Admin
How to Add an Image to a Microsoft Lists Image column using Power Automate
In a previous post, I wrote about the changes Microsoft did to the Image column in Microsoft Lists and how that change had an impact on how things work now in SharePoint.
In this article, I will show you how to bypass a limitation of the Power Automate connector, which does not support the Image column from the UI yet. The solution is to use the SharePoint REST API to fill in the field as a workaround.

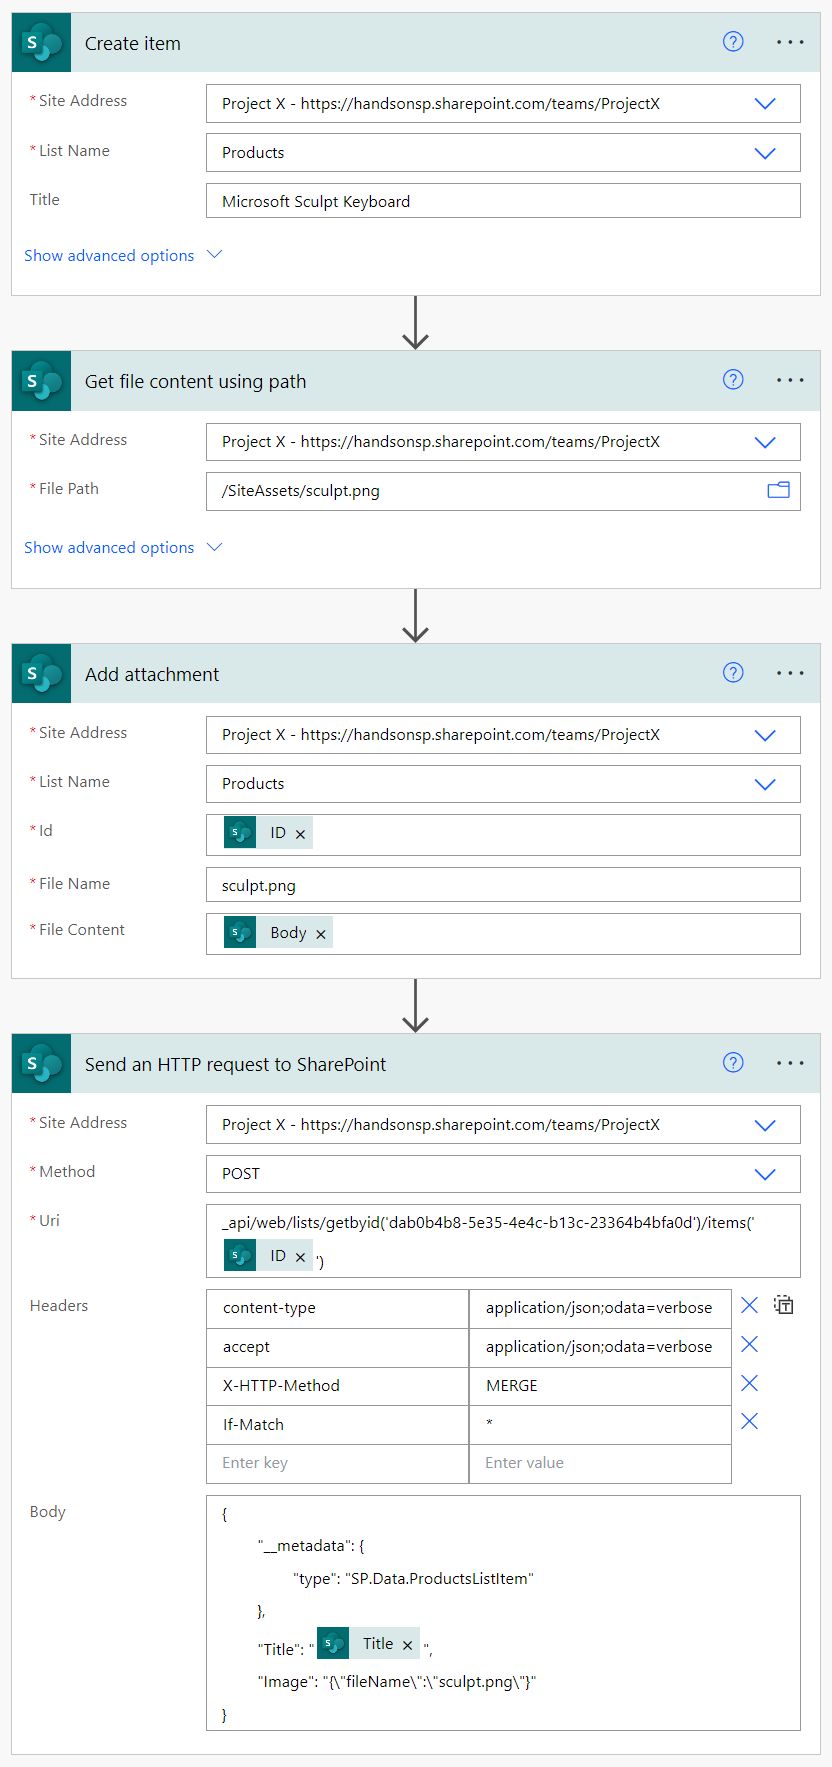
This scenario may not match exactly what you need to populate your lists, but I used it as a simple example to show you how to get all the information you need to populate the Picture column with Power Automate. Here is what I did:
- First, I created the item in the list with the required metadata. For this example, I used a list called Products with a image column called Image
- Then, I got the image file that I wanted to add to the item. To test it, I already had the image stored in the Site Assets document library.
- Next, I added the image as an attachment to the list item using the Add attachment action from the SharePoint connector. I specified the list name, the item ID, the file name, and the file content from the previous step.
- Finally, I updated the list item to point the image column to the attachment using the Send an HTTP request to SharePoint action from the SharePoint connector. I used the following parameters:
- Method: POST
- Uri: _api/web/lists/getbyid(‘dab0b4b8-5e35-4e4c-b13c-23364b4bfa0d’)/items(@{triggerBody()?[‘ID’]})
- Headers:
- Content-Type: application/json;odata=verbose
- accept: application/json;odata=verbose
- X-HTTP-Method: MERGE
- If-Match: *
- Body:
{
	"__metadata": {
		"type": "SP.Data.ProductsListItem"
	},
	"Title": "@{outputs('Create_item')?['body/Title']}",
	"Image": "{\"fileName\":\"sculpt.png\"}"
}
Here is the screenshot of the Power Automate flow:
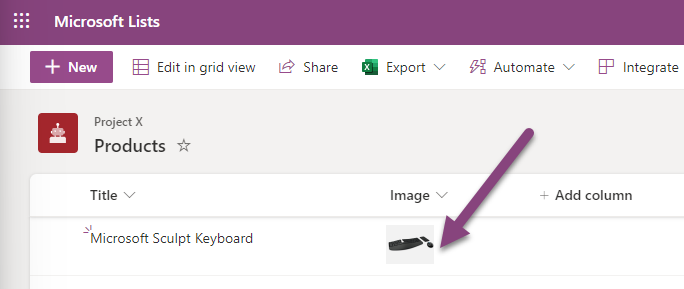
And here is the result in the Microsoft List:
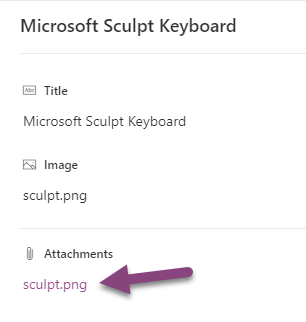
The only thing I wasn’t able to figure out yet is how to make the attachment hidden in the item, following this method will display the image in the list of attachments. If you have any suggestions or feedback, please let me know in the comments.
I hope this post was helpful and you learned something new. Stay tuned for more Power Automate tips and tricks.


February 7, 2024
_api/web/lists/getbyid(‘dab0b4b8-5e35-4e4c-b13c-23364b4bfa0d’)
For getbyid, how do I get the id of my sharepoint list?
February 7, 2024
Hi He Wei,
You can get the list id from the settings URL to the list.
1. Go to the list settings
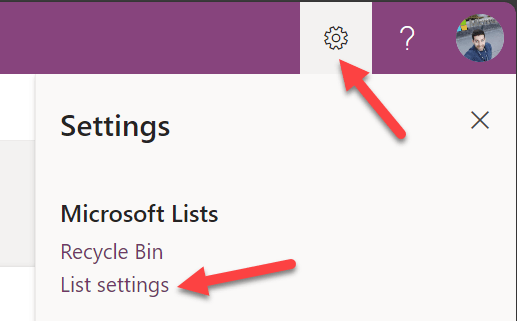
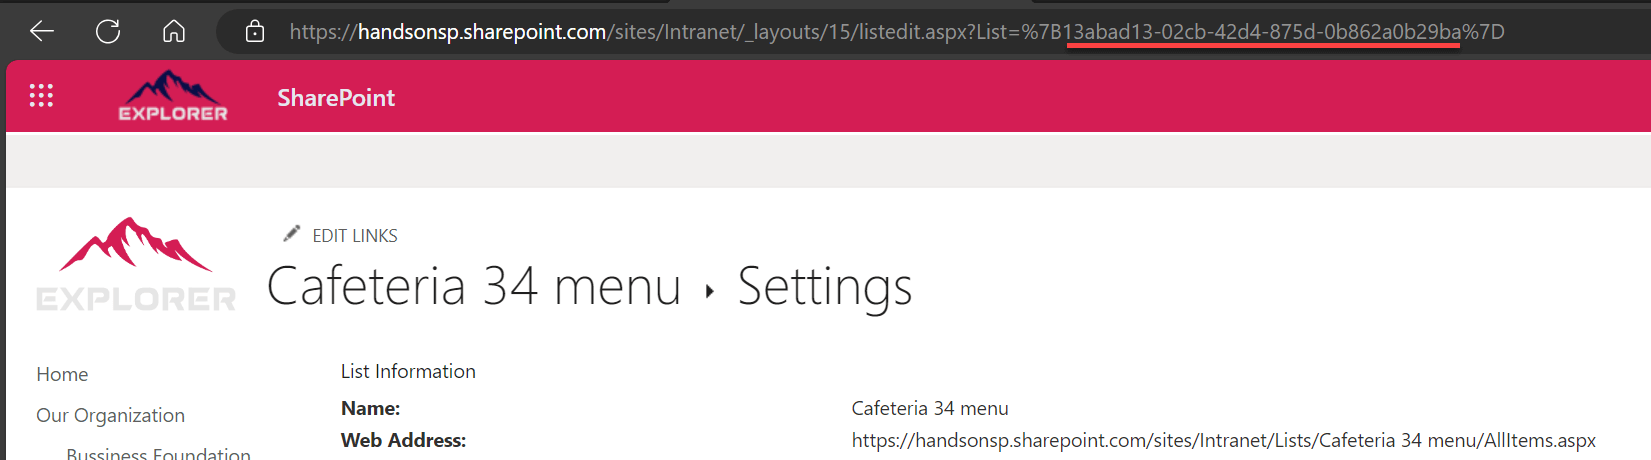
2. From the URL copy the value between %7B and %7D
Have a nice day 🙂