

 HANDS ON SharePoint
 HANDS ON Teams
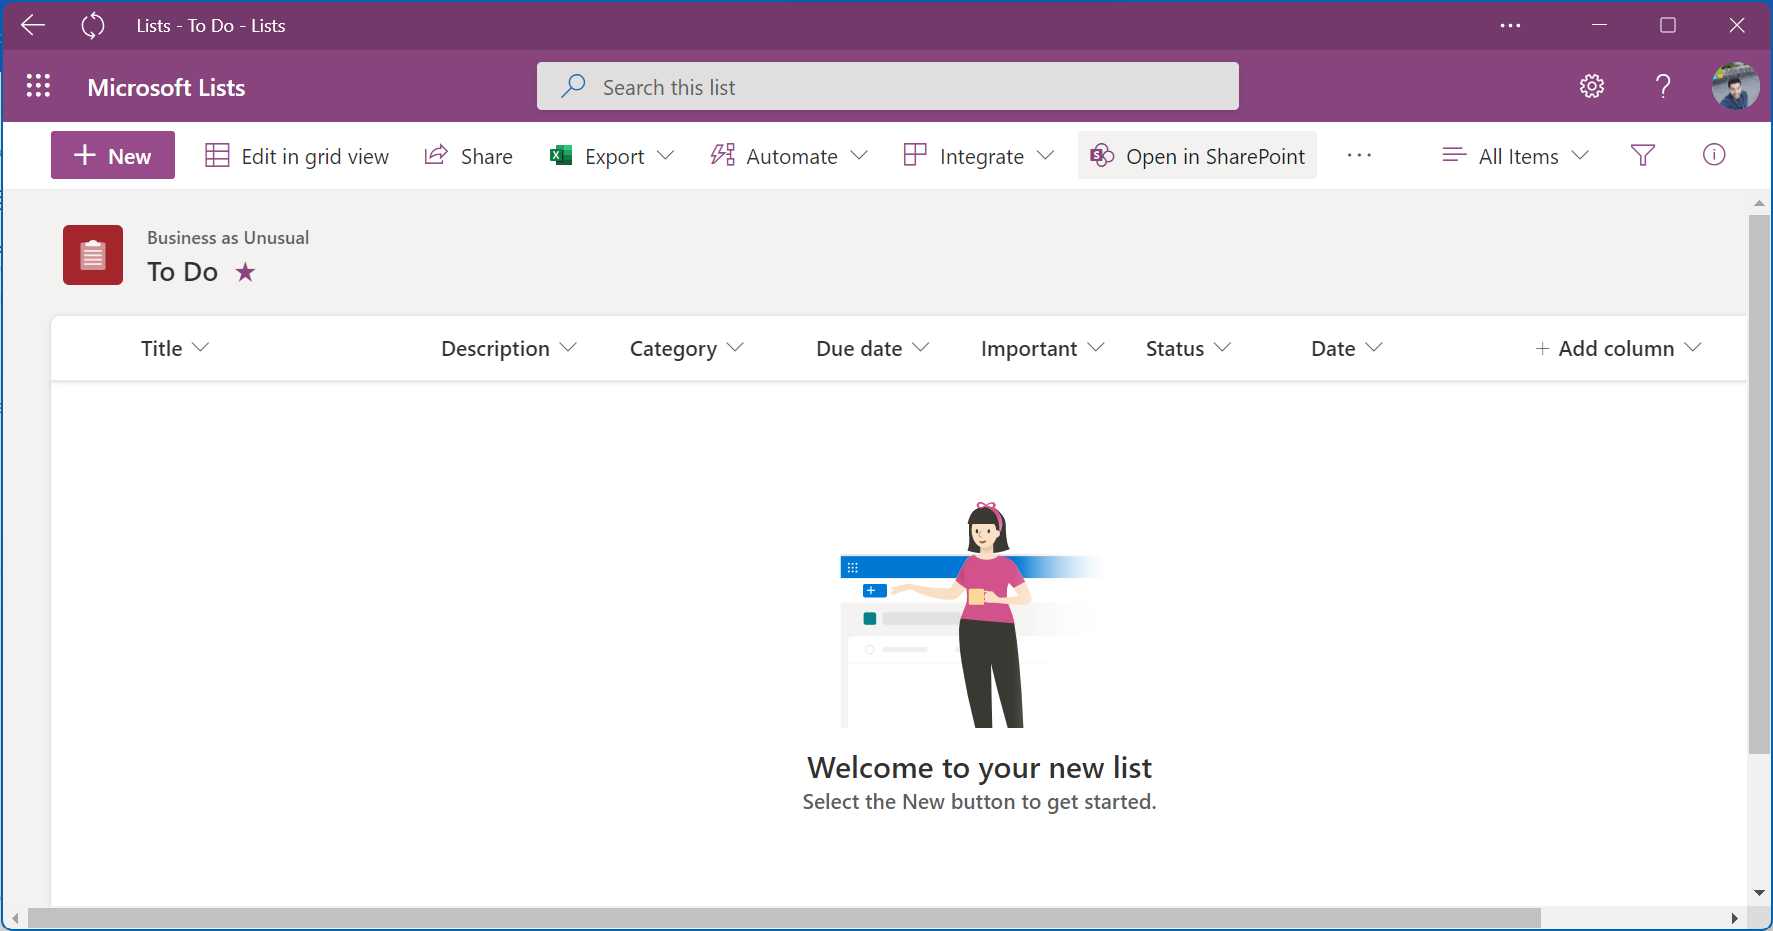
 HANDS ON Lists
 HANDS ON tek
 M365 Admin
How to create a To Do list using SharePoint and Microsoft Lists view formatting – Part 1
The Microsoft ecosystem has plenty of options for users to store their tasks, Microsoft To Do, Planer and the new Tasks application available in Microsoft Teams are all valid options.
Microsoft Lists on the other hand can be also an option, however there are no readymade templates from Microsoft to create a simple To Do list with an appealing layout.

To fully explore the capabilities of the modern list formatting I’ve decided to create my own To Do list using a custom view formatting that replicates the layout of Microsoft To Do. In this series of articles I’ll guide through a detailed explanation of the process so you can also get something similar to what is illustrated in the following image.
Analyzing Microsoft To Do main features
Before jumping into the creation of a new list, let’s have a look to Microsoft To Do and select the relevant fields that should be stored in our list.
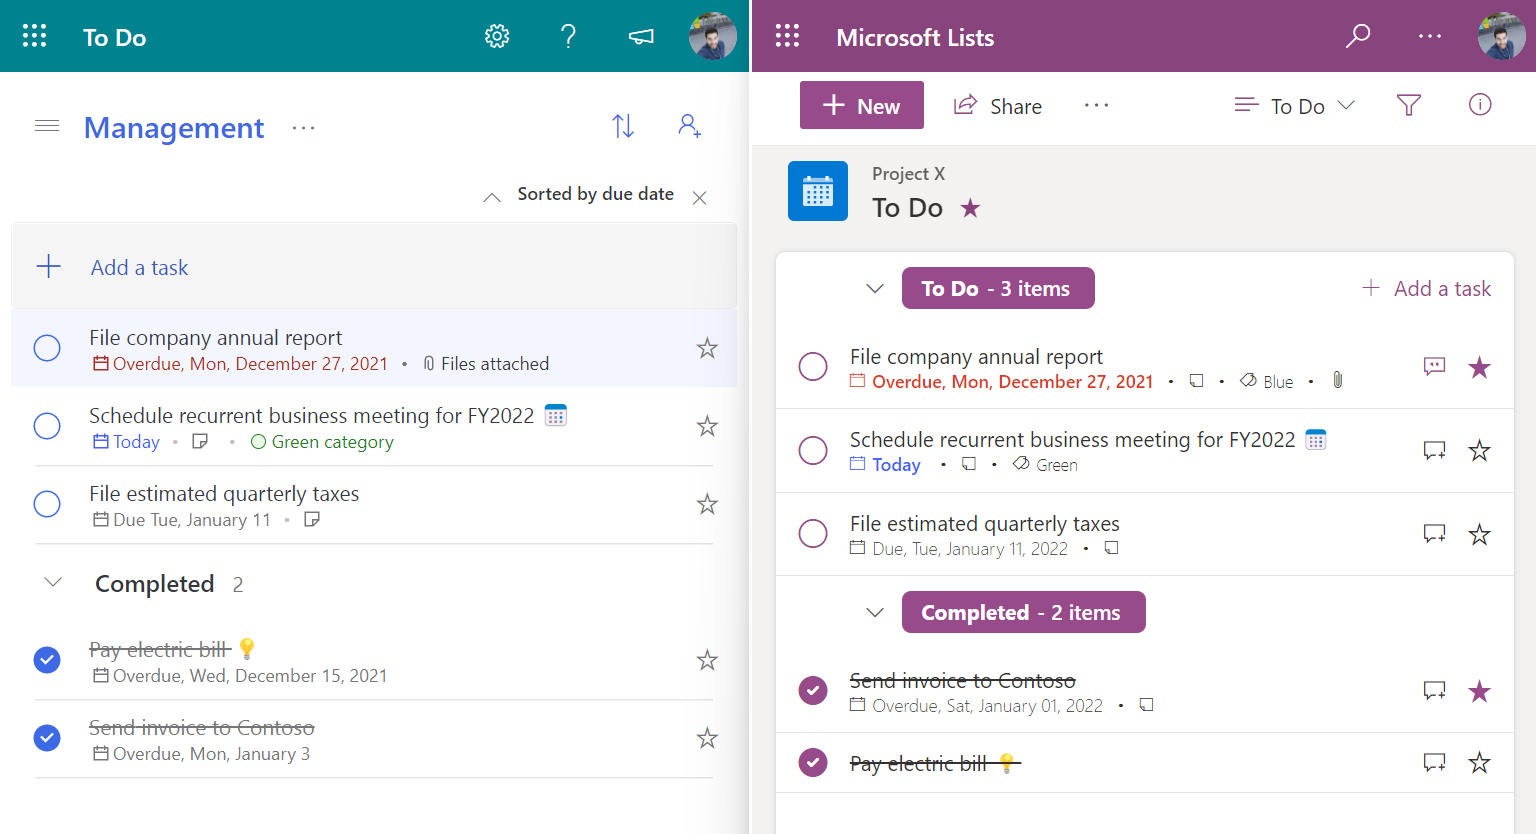
In the following image you can see a Task detail in Microsoft To Do with all its main components highlighted and explained.
- Task title – To store this information we will use the default Title column that exists in Microsoft Lists, a single line of text that can store up to 255 characters.
- Task description/notes – This field is used to add more information about a particular task, to store this information in Microsoft Lists we will use the column type multi lines of text.
- Due date – The date limit to complete the task. Tasks with the due date smaller than the current date are shown with the word Due followed by the date value and tasks with the due date higher than the current date are shown with the word Overdue. Overdue tasks that are not done show the due date in red. To store this information in Microsoft Lists we will use the column type Date and time.
- Category – The category will help you to better identify and organize your tasks, to store this information in Microsoft Lists we will the column type Choice.
- Status – This is the field that will mark the task as completed, to store this information in Microsoft Lists we will use the column type Yes/No.
- Attached files – To replicate this functionality in Microsoft Lists we will take advantage of the attached files feature that exists by default for each list item, this means that there is no need to create a list column to store the information.
- Created – To show the created date we will use the default Created column that exists in lists by default, this column stores the date when the item was created and is filled automatically by Microsoft Lists.
- Updated – To show the updated date we will use the default Modified column that exists in lists by default, this column stores the date when an item was last modified, this can be updated due to the task completion or due to the update of any other field.
- Mark as important – The mark as important feature moves the task to the top of the list so you can easily access to it, to store this information in Microsoft Lists we will use the column type Yes/No.
- Delete task – The option to delete a task can be also added to Microsoft Lists directly in the task context like in Microsoft To Do, this feature is implemented through the use of a list view formatting and does not require the creation of any column.
Microsoft To Do includes other features like reminders and the recurrence for each task however those are not being implemented by this solution in Microsoft Lists.
Creating a To Do list in Microsoft Lists
Now that we know the features from Microsoft To Do that will be replicated in Microsoft Lists, the first step is create a new custom list by doing the following:
- Open Microsoft List using the browser or using the PWA application, and click in the New list button located at the top of the window
- On the Create a list pop-up click on Blank List
- Provide a name and a description for your new lists, choose a color and an icon, and select where do you want to save the list. If you are willing to share the To Do list with other members of the organization it is recommended that you select one of the available SharePoint sites, otherwise select My Lists.
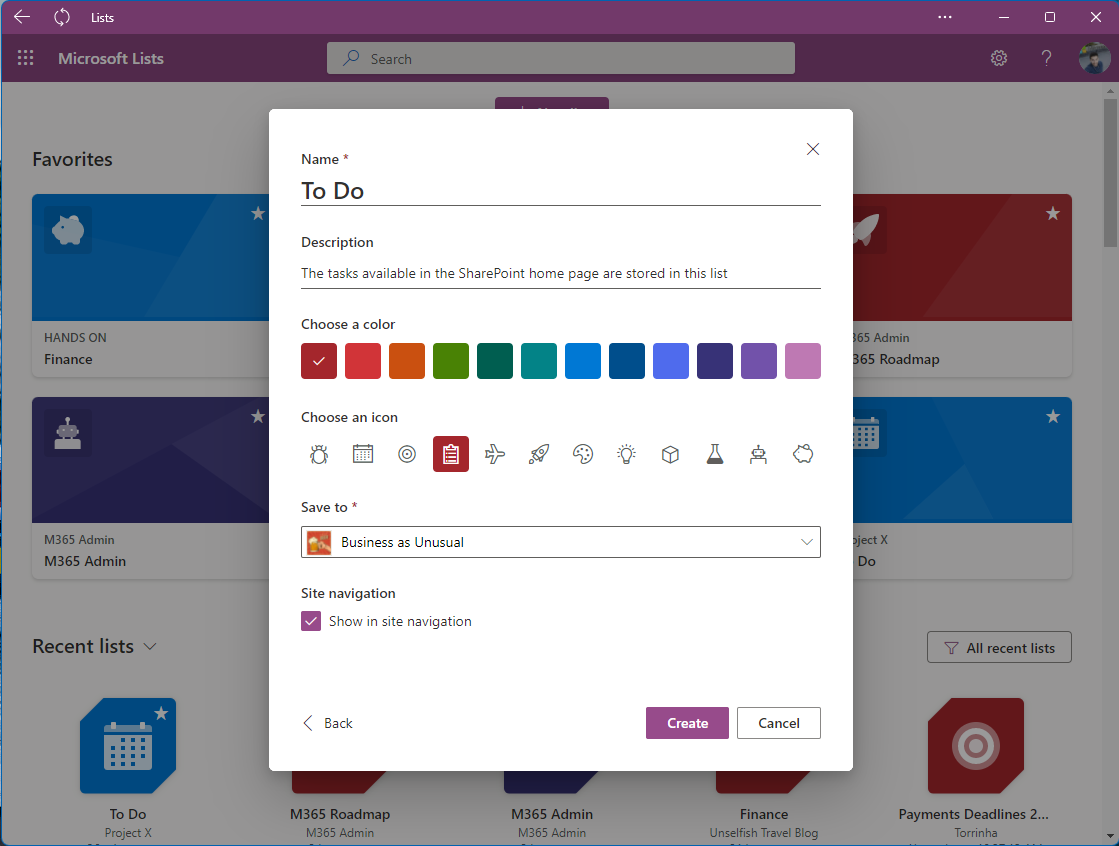
- Click Create
- Once the list gets created click in the Add column option; add the columns as detailed in the following table, make sure you create them with the same name and the same column type as described here, a different name or a different type may have an impact in the view formatting provided in this article
| Name | Column type |
|---|---|
| Description | Multiple lines of text |
| Category | Choice, you must define here your own categories |
| Due date | Date and time |
| Important | Yes/No, with default value set to No |
| Status | Yes/No, with default value set to No |
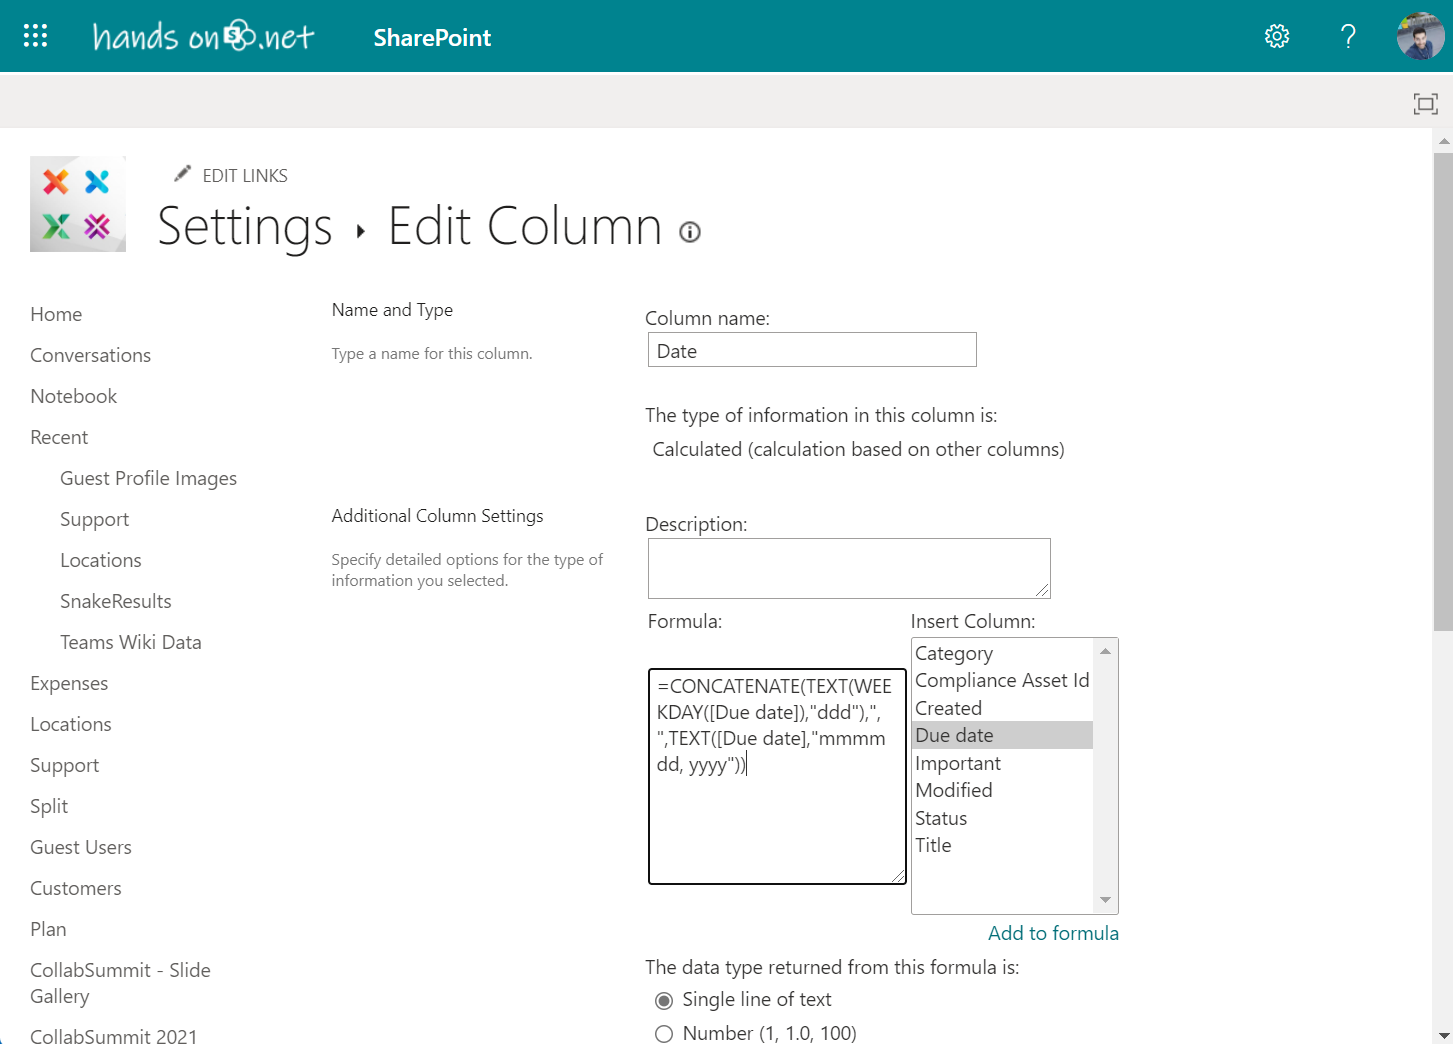
| Date | Calculated, as a single line of text using the formula:=CONCATENATE(TEXT(WEEKDAY([Due date]), "ddd"), ", ", TEXT([Due date],"mmmm dd, yyyy")) |
With all the columns created your list will look like the one in the following image.
As you can see at this stage it doesn’t look like Microsoft To Do yet, to proceed with the customization move to next section were we will create a new view for the To Do list.
Create a To Do view in Microsoft Lists
To continue to give you access to the Microsoft Lists data in the classic list format, we will now create a new view for the To Do layout with custom settings including:
- Created and Modified fields
- Sort by Favorite followed by Due date
- Group by Status
To create the new view for the list you should do the following:
- Open the view selection menu and click on Create new view
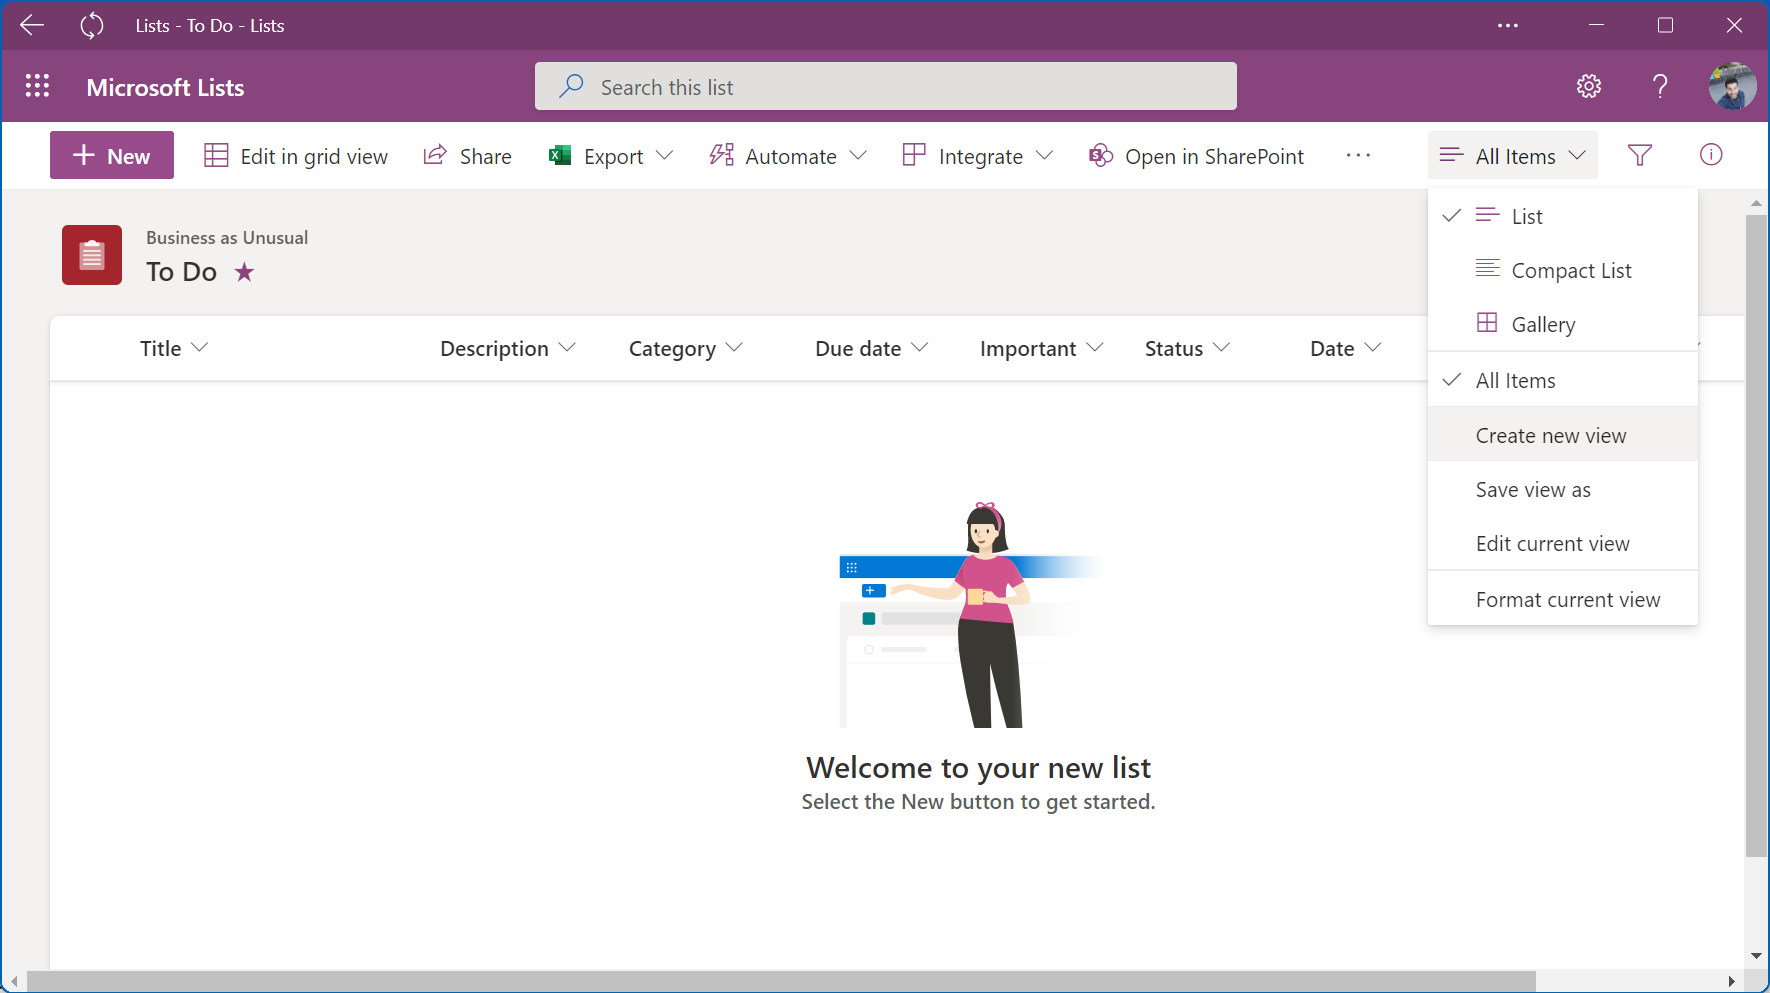
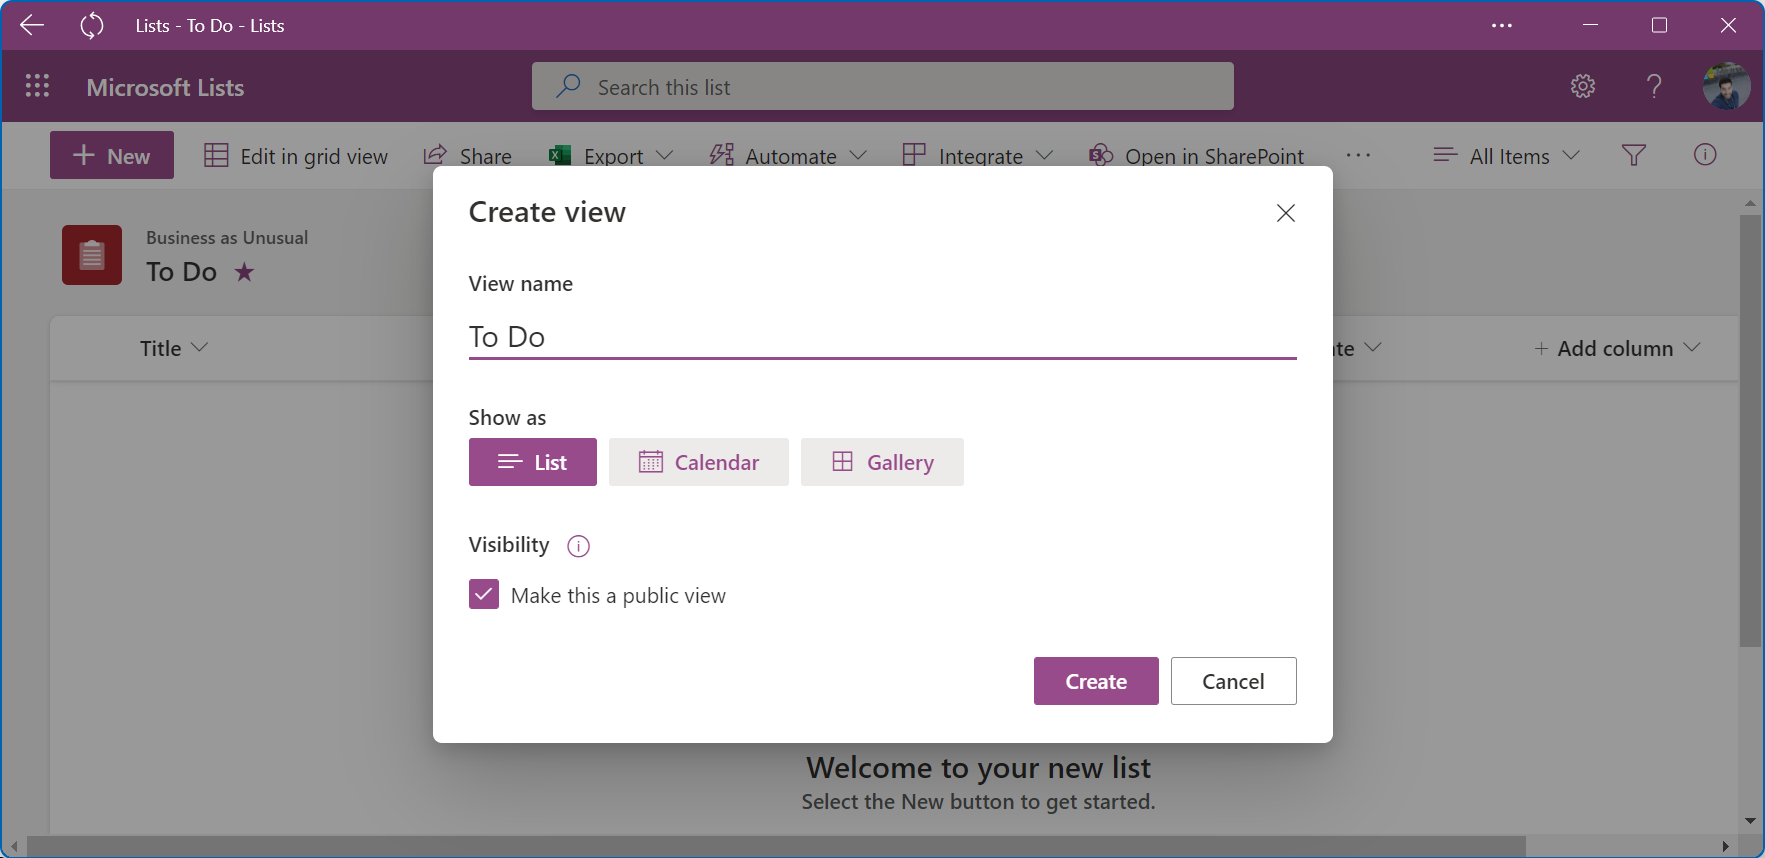
- Provide a view name, e.g. To Do
- Select Show as list
- Make sure the option Make this a public view is checked
- Click Create
- Not all the necessary changes to the view are yet available from the Microsoft Lists interface so we need to use the classic SharePoint view settings page, to access to it open the view selection menu and click on Edit current view. This option will open the classic SharePoint interface in a new tab.
- In the Columns section you need to select 4 extra columns:
- Created
- Created By
- Modified
- Modified By

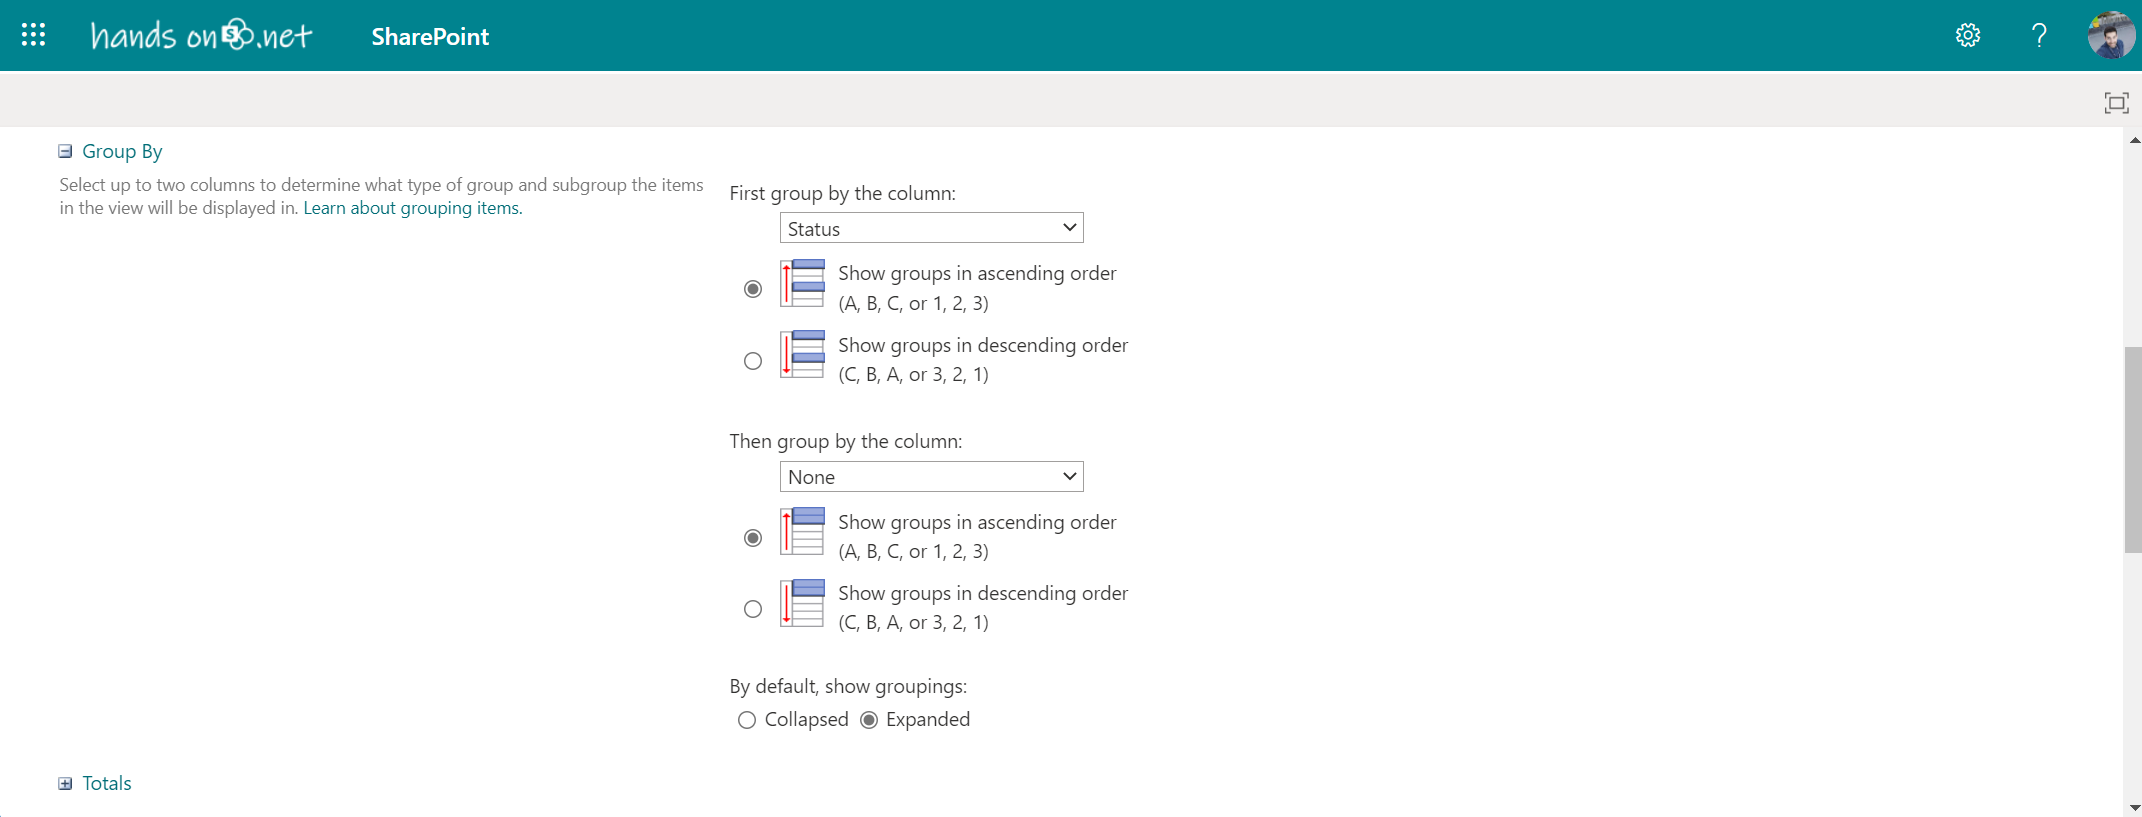
- In the Sort section, select Important in the First sort by the column dropdown and then select Show items in descending order; select Due date in the Then sort by the column dropdown and then select Show items in ascending order.

- In the Group by section, select Status in the First group by the column dropdown and then make sure you select Expanded as a default option to show groups.
- Click Ok to save your newly modified To Do view.
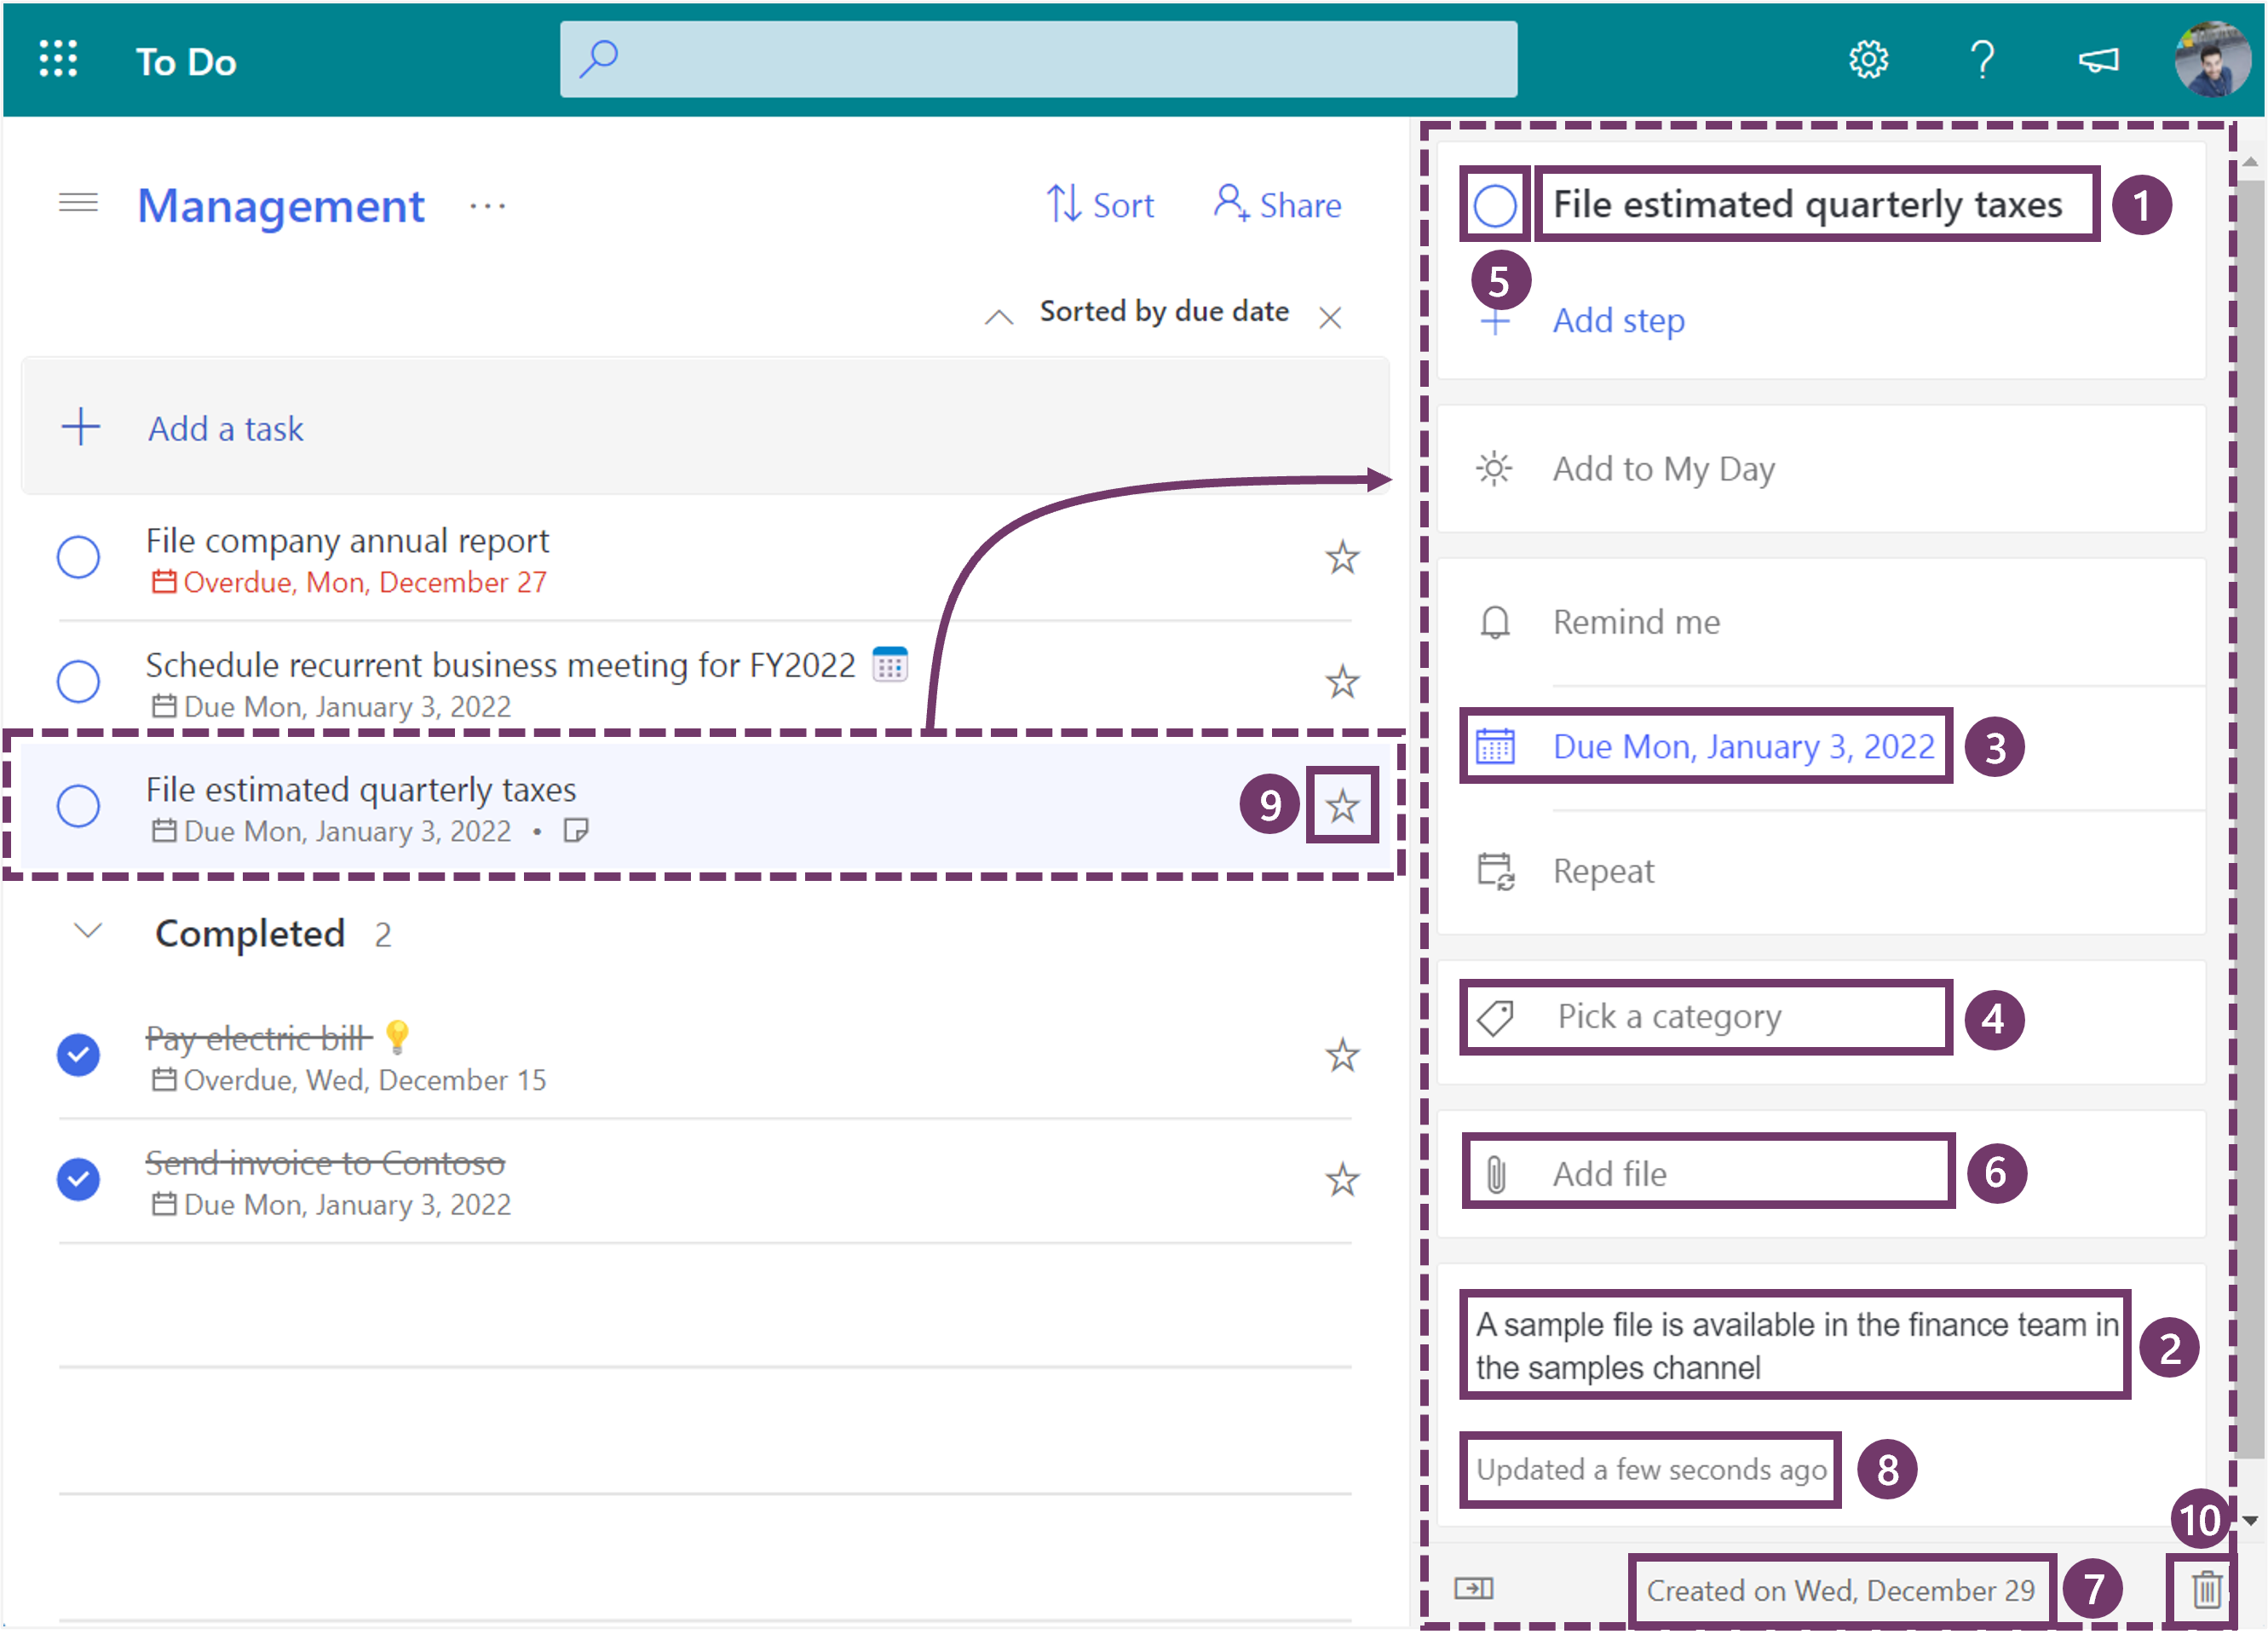
Visually if you don’t have any tasks yet in your list you will not notice any difference between the All Items and the To Do views. To make sure the new view is properly configured I recommend you add 2 items, one of them with the completed status so you can see the list groups. The result should be like the one shown in the following image.
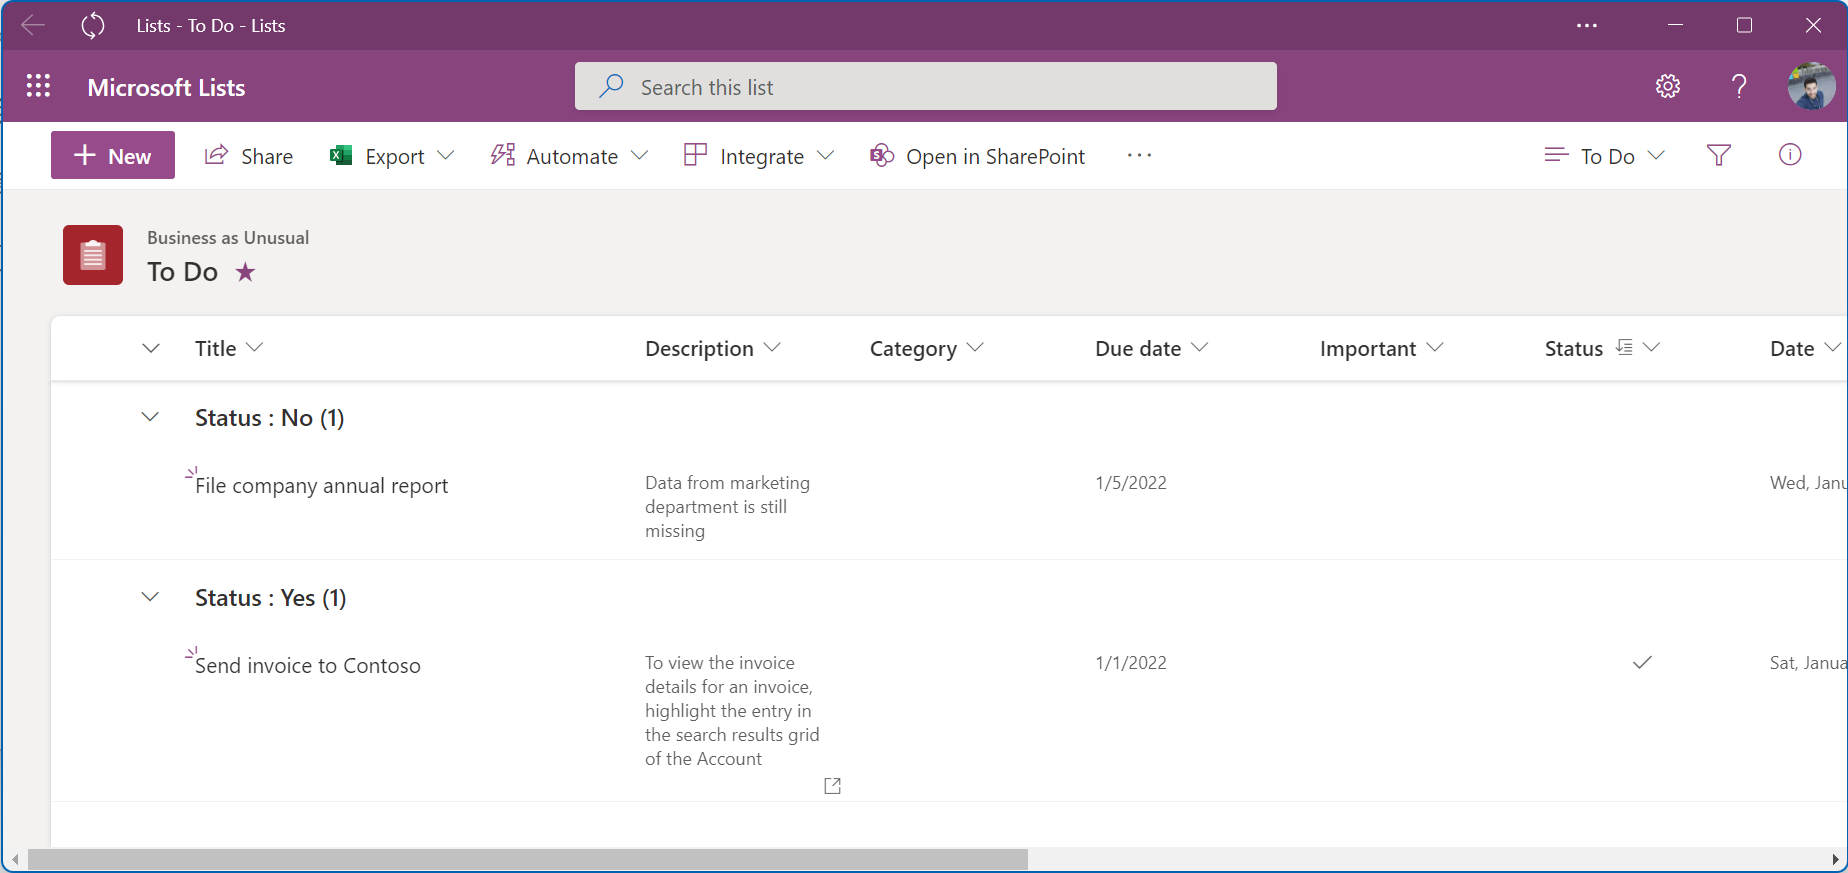
Your To Do list is now ready to be used and will show all your tasks, however the layout is not as good as the one used by Microsoft To Do, to address this issue we will have to apply a custom view formatting as explained in Part 2 of this article.
If you want to see this formatting in action before executing it in your tenant have a look to the video I’ve recorder explaining the entire process.


February 8, 2023
This is amazing work!! Thank you.
I have one question: is there any way to implement subtasks (or steps, how Microsoft calls it in the ToDo app)?
March 23, 2023
Hi Mark,
Using this formatting is not possible that would add a huge level of complexity.
To build something like that I recommend to build a custom web part.
November 16, 2023
The Date formula: =CONCATENATE(TEXT(WEEKDAY([Due date]), “ddd”), “, “, TEXT([Due date],”mmmm dd, yyyy”)) does not work. I kept on getting syntax error. 🙁
February 9, 2024
Hi Venice,
The formula had the wrong quotation mark on it, I fixed it in the article already.
If you are still have this issue use this value instead.
Have a nice day 🙂